Showing posts with label Slimline Card. Show all posts

Wednesday, June 14, 2023

Introducing the Heartfelt Creations Festive Christmas Collection.....

Good morning everyone and welcome as we introduce the brand new collection from Heartfelt Creations...the Festive Christmas Collection! I have a new card for you and you can find it in the Heartfelt Creations Gallery.  


My finished card size is 4" X 9".  I used the Deluxe Flower Shaping Paper to make the base as it is a perfect weight for anything you want to add to it.  Cover with a piece of Sheet 4A from the paper Collection.     Dilute some of the Designer Dries Clear Adhesive with water and paint with a brush onto the paper then dust with the glitter.  Allow this to dry.  

Cut two of the Slim Stars Lattice Rectangle Die, once with white cardstock and once using the Luxe Silver Cardstock.  Offset the silver behind the white and glue together.  Glue to the card front.  

Stamp the Lantern and the little bird onto watercolor paper using Memento London Fog ink.  Using the water brush and Distress ink and the Zig markers color the image and set aside to dry.  Once dry add some glue and then sprinkle with glitter.  Allow this to dry.  Die cut with coordinating dies and set aside.  Decide on placement and adhere with dimensional tape.  

Stamp the sentiment with Distress ink and cut out with coordinating dies.  Layer this onto the Luxe Silver cardstock and then adhere to card front with dimensional tape. I just cut a piece of silver cardstock a bit larger than the sentiment and eye balled where to cut to make it a banner.

Cut a length of white seam binding and color with the Distress ink, scrunch and set aside to dry.  Once dry tie a bow and glue to the top of the lantern.  


Wednesday, March 15, 2023

Inspiration Wednesday with Heartfelt Creations...

Good morning friends and welcome!  I'm here this morning to share with you another project featuring the Feathery Florals Collection from Heartfelt Creations!  You can find my card and all information about this project in the Heartfelt Creations Gallery.

My finished card is 4 X 9.  Make card base and cover with a piece of 12B of the paper collection.  Using the Slim Elegant Rectangle die, cut out one in white and one in gold.  Then cut out one of the other dies in the set to go in the center to serve as a medallion. I used a piece of sheet 2B for this.  I also cut one of these out of white cardstock and glued them together to give it a bit more strength.  I adhered with dimensional tape to the center of the card front.  

Stamp the flower and the feathery piece using Toffee Crunch ink and color with pencils and odorless mineral spirits.  Cut out using coordinating dies.  I cut apart the flower piece and then glued it to the feather.  Add glitter to both and then I added gold Gala Glitz and allow to dry.

The card is finished.  

Wednesday, September 21, 2022

Inspiration Wednesday with Heartfelt Creations...Continuing on with the Hollyhock Garden Collection...

Good morning my friends and welcome to my blog!  As we continue along with the Hollyhock Garden Collection from Heartfelt Creations,  I'm offering a slimline card this morning.  You can find my card in the Heartfelt Creations Gallery with a listing of all products used to make it. 


 My finished card size is 3 1/2" X 6 1/2".  Make card base and cover with a piece of Sheet 8B of the paper collection.  Cut a piece of white cardstock 3" X 6" and cover with a piece of Sheet 12B.  

Cut two of the French Gate Dies; one from White Cardstock and one from Gold.  Glue together offsetting a bit so the gold shows through behind the white. Glue to the 3" X 6" piece of white cardstock then glue to the card front.

Stamp the flowers onto the Deluxe Flower Shaping Paper using New Sprout and cut out using coordinating dies.  Color the center with New Sprout and the edges with Magenta Hue the the very edges with Vibrant Fuschia.  I colored front and back of the petals.  Lay onto the shaping mold, spritz with water and run through a die cut machine.  Turn out on the desk and allow to dry.  I also did a bit more shaping with the Deluxe Flower Shaping Kit at this point.  Once the petals dry add the Prills to the center and allow to dry.

Stamp the greenery from the Hollyhock Fence and the Hollyhock Stems and Blooms using Leaf Green then color using Leaf Green and brush the edges with Olive to add a bit of depth. I used hot glue to add the flowers to the greenery then I hot glued to the card front.  The card is finished. 

Wednesday, August 24, 2022

Inspiration Wednesday with Heartfelt Creations....

Good morning friends and welcome.  Wednesday has rolled around once again and I get to share another Heartfelt Creations project.  You can see my project in the Gallery with a listing of all the products used.


My finished card size is 3 1/2" X 6 1/2".  Make card base and cover with a piece of Sheet 9B of the paper collection.  Using The French Gate Die cut a piece of Sheet 12B with the larger rectangle.  Use dimensional tape and adhere to card front.  Using white cardstock cut out the French Gate Die and also cut one using the Luxe Gold card stock.  Glue these two pieces together so the gold shows under the white.  Glue to card front.  

Stamp the flowers using Leaf Green and color with various colors of Archival inks.  You can use your imagination here and color these the way you love them.  I used Magenta Hue and Vibrant Fushia, Sunflower and then Ultra Marine Blue and Manganese Blue.  The greens are Leaf Green and Olive.  Use coordinating dies to cut out the florals.

Apply Crystal Lacquer to the blooms of the florals and sprinkle with glitter then set aside to dry.   

Stamp the dragonfly onto Flower Shaping Paper and also onto the Vellum using Archival Jet Black ink.  Emboss both pieces with gold embossing powder then use coordinating dies to cut out.  I colored with Forget Me Not and Cactus flower.  Glue the Vellum dragonfly and the paper dragonfly together and lift up on the vellum dragonflies wings.  Glue to the top part of the card. 

Decide on the placement for the flowers then glue down with hot glue.  The card is finished.

Wednesday, March 30, 2022

Inspiration Wednesday with Heartfelt Creations...

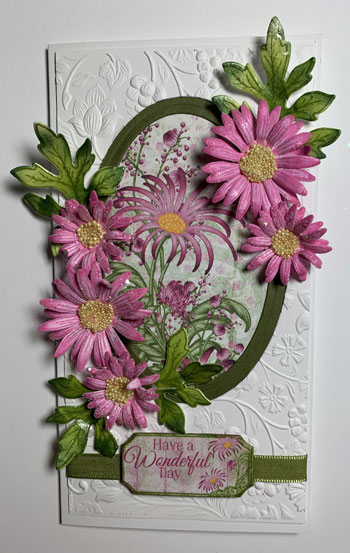
Good morning my friends and welcome to this Inspiration Wednesday from Heartfelt Creations.  I'm here this morning to share another card I have made using the Wild Aster flowers.  I love this flower and I use it quite a bit because it is so easy to shape and make!  You can find my card in the Heartfelt Creations Gallery


My finished card size is 3 3/4" X 7".  Make card base and set aside while we work on the elements.  

Cut a piece of white cardstock 3 1/2" X 6 3/4".  Use one of the oval dies and cut an opening in the cardstock.  I just eye balled this.  I used the embossing folder at this point and set it aside.  Using green cardstock cut a piece about 3 1/4" X 6"  and cut a smaller oval in it.  Position the green piece behind the white embossed piece making sure it is even in the opening and glue down.  I chose a piece of the paper collection and cut a piece to lay behind the opening.  Glue this down.  Wrap a piece of ribbon around the bottom of the card panel and use Scor-Tape to adhere to the back of the panel.  Cut out one of the tags from the paper collection and using dimensional tape, adhere to the panel over the ribbon.  Glue this panel to the card front.

Now we are going to work on the flowers.  Stamp the flowers onto Deluxe Flower Shaping Paper using Magenta Hue ink. Color these petals with Magenta Hue as well.  Use coordinating dies to cut out the flower petals.  Stamp the leaves using Fern Green and color with Leaf Green ink.  Cut out using coordinating dies.  Edge the leaves with Olive ink to give dimension to them. I used Stack and Store Daubers to add color to the flowers and leaves. Shape the leaves a bit using the Deluxe Flower Shaping Kit and then brush on Glossy Accents and set aside to dry.  Shape the flowers using the Deluxe Flower Shaping kit and then hot glue two petals together being careful to offset the petals.  Add the Lemon Chiffon Prills to the centers of the flowers and set aside to dry.  Once dry, use Hydra Sponges and Dries Clear Adhesive to add glitter to the flower petals and then set aside to dry.  Once everything is dry decide on placement and hot glue to the card front.   

Wednesday, October 6, 2021

Heartfelt Creations...Just For You Sunflower Slimline...

Good morning and welcome my friends.  These new slimline cards are a favorite of mine and I find I want to make this type of card for all occasions! I also adore sunflowers so this new collection just speaks to me and I have used this flower on my card again today!


My card size is 4" X 8 1/2".  Make card base and then cut a piece of blue cardstock 1/8" smaller and glue to card front.  Cut a piece of Sheet 4B smaller than the blue piece of cardstock and glue it down. I added dimensional tape to this piece of the paper collection. 

Cut two Royal Elegance frames, 1 using white cardstock and one using gold cardstock. I also used the Eyelet Oval and Basics Snmall dies to cut out the center of these two.   Layer the white die cut over the gold one and glue so that it is showing a bit behind the white piece.  Diecut a piece of Sheet 4B using an oval and glue it behind the gold and white diecut piece.  Stamp the sentiment onto this using black ink.  Use dimensional tape to adhere to card front.

Stamp the flower petals using Memento Dandelion ink and stamp the leaves using Fern Green ink.  Color the leaves using Leaf green ink and cut out using the coordinating dies.  Edge the leaves with Olive ink to add some shading.  Color the flowers using Cantaloupe, Sunflower and Rhubarb Stalk ink and cut out using coordinating dies.  Lay leaves and flower petals onto the shaping mold and spritz with water.  Run through the die cut machine and then turn them out onto your desk to dry.  

Once dry use a Hydra Sponge and Dries Clear Adhesive to add glitter to the flower petals.  Glue two petals together to form the flower.  Add the homemade center and allow everything to dry.  

Once everything is dry, decide on placement and hot glue down.  The card is finished.  

You can find my card and more details in the Heartfelt Creations Gallery:  You  might also like to visit the Heartfelt Creations Blog to see what the other designers have submitted.  I know you will be inspired with all the lovely creations there!


Wednesday, September 1, 2021

Inspiration Wednesday with Heartfelt Creations...

Good morning friends and welcome to my world.  This post is going to be another long one as I have two cards to post.  So bear with me and enjoy.  You can get lots of inspiration by going to the Heartfelt Creations Blog.

My first card is Starry Night Festive Poinsettia and you can see it here in the Heartfelt Creations Gallery.


My finished card size is 6 X 6.  Make card base using Deluxe Flower Shaping paper; it is just the right weight for this use.  Cover the card base using Sheet 8B of the Home for the Holidays Paper Collection.  

Using white cardstock cut two of the Starry Night decorative die.  Glue together and then glue to the card front. Set this aside while we work on the flowers.

Using Deluxe Flower Shaping paper and Archival Fern Green ink, stamp the Holly Berry Spray, Poinsettia and Holly leaves. Color the leaves with Archival Leaf Green and cut out with coordinating dies.  Color the flower petals with Archival Leaf Green and Memento Lady Bug ink.  The stamen is colored with leaf green.  Die cut everything with coordinating dies.  Lay onto coordinating mold, spritz with water and run through the die cut machine.  Turn out onto the desk to dry.  Once dry, I used the sponges to add Dries Clear Adhesive to the petals and sprinkled with Crystal Clear Glitter.  Allow to dry then glue petals and stamen together. Decide on placement of flowers and leaves and use hot glue to adhere to card front. 

Stamp the sentiment onto a piece of white cardstock using Fern Green ink.  Edge the piece with Fern Green ink also. Measure and cut a piece of Sheet 8B of the paper collection to fit behind the white piece of cardstock and edge this with Fern Green Ink as well.  Glue to the card front and the card is finished.

My second card is a slimline card called Rosy Birthday Wishes and can be found here in the Heartfelt Creations Gallery.


My finished card is a slinline card measuring 3 3/4" X 8 3/4".  Make card base using white cardstock.  Cut a piece of the paper collection 1/8" smaller, edge with Magenta Hue ink and glue to card front.  Pick out another piece of the paper collection and cut it 1/8" smaller than the first piece, edge it with Magenta Hue and glue it down.  

Now lets work on the roses we will need for the card.  Using white cardstock stamp the rose petals using Magenta Hue.  Color the outside with Magenta Hue and Sap Green for the inside of the petals. Use the coordinating dies to cut out the petals.  I used the largest Golf tool to shape the petals bending and hand shaping. Glue together to make the rose.  I used two of the largest petals, two of the next size down petals and then 3 of the next smallest to make the center of the flower.  I used a hot glue gun to glue the petals together to help them hold their shape. The rose buds have three of the smaller leaves.  Next I stamped 6 of the smaller rose petals using Buttercup and 6 using Sap Green.  I colored them with Buttercup and Sap green and these single petals are shaped using the Flower Shaping kit then I punched a hole in the center of these petals using a small golf tool and inserted a stamen through the center.  The stamen were colored to match the flowers by rubbing them over the ink pad using a Stack and Store Dauber.  Add hot glue to the back of the flowers where the stamen comes through.

Stamp the leaves with Fern Green and color using leaf green. Use coordinating dies to cut out.  Lay them onto the mold, sprinz with water and run through the die cutting machine.  Turn out and allow to dry.

Stamp the butterflies onto Vellum using white ink and emboss with white embossing powder.  Cut out with coordinating die.  I colored them with a Stack & Store Dauber and Garden Patina and Cactus flower.  Glue two butterflies together and adhere to card front. 

The Birthday sentiment was found on the paper collection and cut out.  I used dimensional tape to adhere to card front.  Decide on placement of the flowers, leaves and the butterfly and hot glue to card front.  

The final step is to use a sponge and glue to add glitter to the flowers.  The card is finished.   


Wednesday, March 24, 2021

Flourishing Slimline Card...

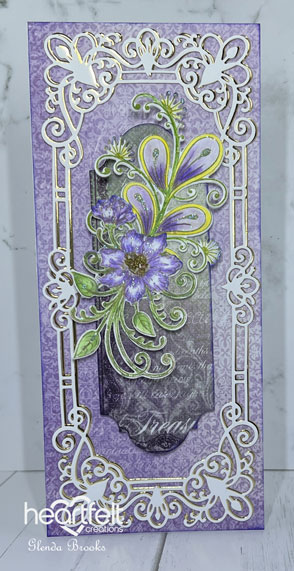
Good morning friends and welcome of Heartfelt Creations Inspiration Wednesday!  As we continue along with the Spring Garden Collection I want to share this slimline card.


Other Products: White Cardstock, Purple Cardstock, Dimensional Tape, Die Cutting Machine, Hot Glue Gun

Instructions: My card size is 3 3/4" x 8 3/4". Make card base and add dark purple layer then a piece of sheet 4A from the paper collection. Die cut the Ornate Flourish Gateway die twice, using the lighter purple cardstock. Edge both pieces with the Majestic Violet ink to add some more dimension then lay them end to end on the card front and glue down. Stamp the sentiment using Majestic Violet.

Stamp the flowers onto the Flower Shaping Paper using Majestic Violet ink and using the Stack and Store Daubers add Majestic Violet to the center of each flower. Cut out using the coordinating die and then add Majestic Violet ink to the edges of the flowers Lay them into the 3D mold and spritz with water then run through the die cut machine. Turn them out onto your desk and using the Flower Shaping Kit use pressure to the center of each flower causing them to be more dimensional. When dry, add prills to the centers and allow flowers to dry. Stamp the Hyacinth onto Flower Shaping Paper using Fern Green ink. Color the leaves with Leaf Green and edge the leaves with Fern Green. Cut out using the coordinating die. I used hot glue to glue down the flowers so they would dry quickly. Add glitter to the flowers and allow to dry. Center the Hyacinth onto the card front and using dimensional tape glue down. The card is finished.