Good morning friends from a frosty East Tennessee! I think most of us are in the same boat...so far no ice or snow but it may be on the way. I do have a lot to be thankful for as my electricity is still going!
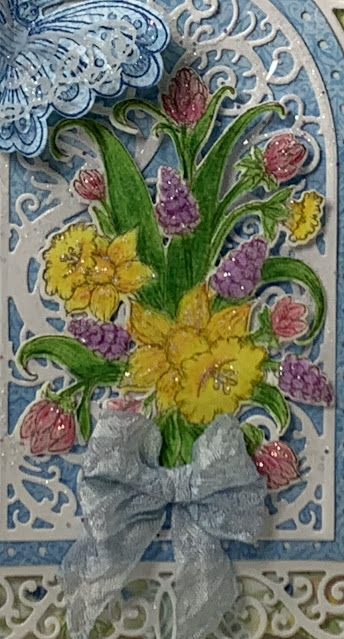
I'm here this morning to share another card I have made using the Delightful Daffodil collection. With the weather we are having it is good to think of Spring. I actually have little Daffodil shoots coming up in my landscaping. That makes me feel like Spring is coming!
Products Used:
Delightful Daffodil Paper Collection, HCDP1-2124
Delightful Daffodil & Butterfly Cling Stamp Set, HCPC-3943
Delightful Daffodil & Butterfly Die, HCD1-7341
Vellum Paper - 10 Sheets, 3-GN2911-F
Designer Dries Clear Adhesive, 159723
Metal Tip for Adhesive Bottles, 352854
Rajni Chawla's Crystal Clear, PGM15015
Crystal Ultrafine Transparent Glitter 1/2 oz., 85-glitter
Memento Dye Ink Pad - Danube Blue, TSMP600
Memento Dye Ink Pad - Rich Cocoa, TSMP800
Zig Clean Color Real Brush Markers - 48 Pack, 478594
Hydra Sponges, RLHS100
Other Products: White Cardstock, Die Cut Machine, Dimensional Tape, Prismacolor Pencils: PC918, PC930, PC929, PC933, PC932, PC912, 742 1/2, PC917, PC931, PC911, PC908, PC916, 734 White Seam Binding, Gamsol, Blending Stumps
Instructions: Using the largest die cut a shaped card for the card base. Cover with a piece of Sheet 4B of the paper Collection. Using Sheet #12B cut out pieces to layer on the card front as well as some using white cardstock. Glitter the white die cuts and on the largest diecut, use dimensional tape to adhere to card front. Glue the other layers down onto the card front.
Stamp the flowers with Rich Cocoa ink and color using the pencils and gamsol. Use coordinating dies to die cut the flowers. Add glitter and set aside to dry. Lay down some color from the Dull Blue Marker, spritz with water and drag the seam binding through the puddle to color. Scrunch and allow to dry. Tie a bow and once the flowers are glued to the card front, glue down the bow.
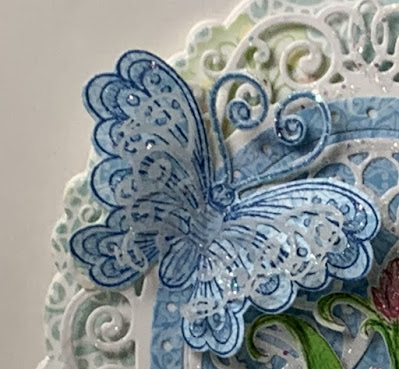
Stamp the butterfly onto a piece of Sheet 12B paper using Danube Blue ink cut out with coordinating die and glitter. Set aside to dry. Using the vellum, cut out the overlay for the butterfly and glitter and allow it to dry. Glue the butterfly and the overlay together and glue to the card front. The card is finished.


