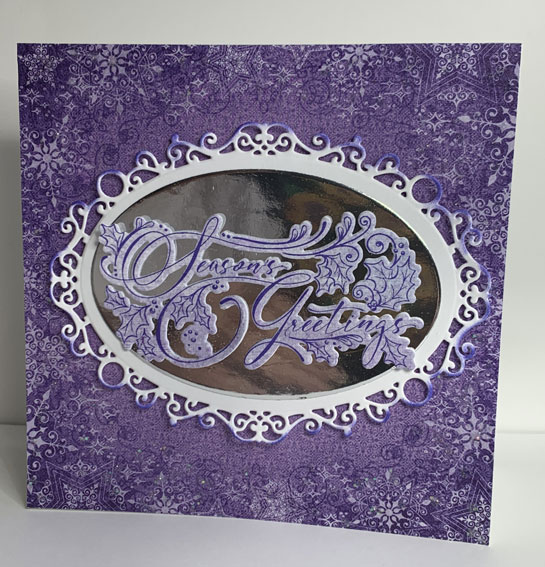
Welcome everyone to Inspiration Wednesday with Heartfelt Creations! I'm here to share another card featuring the new Holiday Star Collection. I know it seems early to begin Christmas Cards but I always find myself facing the holiday and my cards aren't finished....so lets begin! You can find my card in the Heartfelt Creations Gallery Here.
Wednesday, July 27, 2022
Ornate Seasons Greetings....
Wednesday, July 20, 2022
Inspiration Wednesday with Heartfelt Creations - Continuing on with the Holiday Star Collection..
Good morning friends and welcome! Wednesday has once again rolled around and it's time to share another Heartfelt Creations card with you. I'm continuing along with the Holiday Star Collection and you can see my card in the Heartfelt Creations Gallery.
Thursday, July 14, 2022
Dragonfly Birthday Card.....
Good morning my friends and welcome to my blog. I have become very lazy of late and only post on Wednesday and the first of the month but I decided today would be a good day to say hello. July has given me many opportunities to make birthday cards...I needed 5 and so I decided I would share one with you that hasn't already been mailed. I also want to share this withThe Sisterhood of Crafters as their challenge is butterflies, dragonflies and bees. So my dragonfly card just fits perfectly into this challenge.
My cardf uses all Heartfelt Creations products from the Decorative Dragonfly Collection. I hope you enjoy it as I have loved making it!
If you are curious about this group of wonderful crafters and the challenges they provide just head over to this link: The Sisterhood of Crafters You can see what the talented design team has done for this challenge!
Wednesday, July 13, 2022
Introducing the Holiday Star Collection from Heartfelt Creations...
Good morning my friends and welcome! It's Christmas in July and Heartfelt Creations is introducing the Holiday Star Collection! You can find my card here in the Heartfelt Creations Gallery!
My finished card size is 6" X 6". I made my card base using the Deluxe Flower Shaping Paper because it is such a nice weight and can hold anything you mount on top. Make card base and cover with a piece of paper from sheet 10A of the paper collection.
Cut the Courtyard Elegance Die using white cardstock and using a Hydra Sponge and Dries Clear Adhesive add glitter to the die cut. Allow to dry and then glue to the card base.
Using Distress Ink Chipped Sapphire and stamp the star onto white cardstock. Cut out using the center of the coordinating die and set aside. Using Vibrant Violet Stazon Ink stamp the star onto a piece of Luxe Silver Cardstock and emboss with Silver embossing powder. Let it cool and then cut out the star with coordinating die. Glue the smaller star that was stamped in Chipped Sapphire onto the embossed star using a dimensional dot in the center. This makes a star medallion for the center of the card. I used Double Dots to adhere to the card front.
Cut out the sign die twice, once with white cardstock and once with Luxe Silver Cardstock and glue together offsetting a bit so the silver shows through behind the white piece. I used a stamping platform to situate the sentiment and then stamp using Chipped Sapphire Distress Ink. I added dimensional tape behind the sign to adhere to card front
Now lets work on the poinsettia flowers. I stamped the petals using embossing ink and embossed with Silver embossing powder. I did the same for the Holly petals. I colored the flower petals with Magenta Hue and the Holy is colored with Viridian ink. Use coordinating dies to cut out and then lay onto the mold. Spritz with water and run through the die cut machine. Turn out onto the desk to dry. Glue two flower petals together and then glue a Holy piece behind the flowers. Allow to dry. Add Prills to the centers of the flowers and allow to dry. Decide on placement of the flowers and use hot glue to glue to card front.
Wednesday, July 6, 2022
Inspiration Wednesday with Heartfelt Creations...
Good morning everyone and welcome. I just love it when Wednesday rolls around and I get to share a project I made for Heartfelt Creations. You can find my card in the Heartfelt Creations Gallery
Friday, July 1, 2022
Four Seasons Summer Challenge - July - Anything goes...
Good morning friends and welcome to The Four Seasons Challenge for July, 2022. As always anything goes and this is the second challenge for Summer! So gather your supplies think Red, White, and Blue, Fourth of July, Watering Cans and pretty flowers! You can post your project here: The Four Seasons Challenge Blog. The challenge runs from 12:00 AM (EST) on July 1 until 12:00 AM (est) on July 25. The winner will be announced on July 28.
We have an Mood board for July but this is just to help give you some ideas for the season. Remember anything goes!
I picked up on the watering can and decided to use one on my card!
I used lots of glitter on the flowers and on the drops of water coming out of the can but my camera just didn't pick it up! I used shades of blue, lilac and purples and I just love how it turned out! The paper is from the Heartfelt Creations Lush Lilac Collection.


