Wednesday, February 27, 2013

Heartfelt Creations Wednesday.....


Well another Wednesday has rolled around and it's time for my fun part of the week when I get to post my projects that I have made for Heartfelt Creations.  Can you believe it February is almost over and before you know it March will come marching through.  I have loved working with the February release the Sunny Day Collection.  The stamps and dies and papers are just wonderful to work with!


Heartfelt Creations Products Used:

HCPC 3521 Botanical Window PreCut Set
HCDP1 230 Sunny Days Paper Collection
HCD 730 Decorative Butterfly Corner Die

Other Supplies:  Spellbinders Std. Circles Large, yellow ribbon, Memento Ink, glue, Scor-Tape, Canson watercolor paper

Instructions:  Card Size 6” X 6”

Make card base using watercolor paper for stability; cover with a piece of the paper collection.  Cut out and glue down the corner die cut piece to the bottom of the card base.  Cut out the circle and then stamp the sentiment inside the circle to the inside of the card.  Tie a ribbon through the circle and you are done.
 
For other wonderful projects, go on over to the HC blog and have a look around.  The design team members work very hard to bring you fresh new ideas each week and to tempt you with the products!  Also don't forget HC has issued a design team call.  If you have an interest you can get all the specifics on the HC blog.  You should give it a try; you never know the possibilities unless you try!
 
Well I know this has been a long post this morning, so I'm going to get about my business.  Have a great day and try and find a small amount of time to be creative!


Monday, February 25, 2013

The weekend is over and we are groaning because it just didn't last long enough.  Some of us have to go back to work, others are staying home doing the Suzy Homemaker chores but we all groan about it. So let's ease into this week and try to enjoy it!

This morning I'm here to share a tag I made for Heartfelt Creations.  I love the soft colors on this one and hope you enjoy it.


Heartfelt Creations Products Used:

HCPC 3517 Busy Bee PreCut Set
HCPC 3405 Leaf Medley PreCut Set

Other Supplies: Tag, Spellbinders Dies (Fancy Lattice, Foliage, Long Classic Rectangles, Labels Four) Memento ink, Rangers Distress Inks, Scor-Tape, Gesso, seam binding, dew drops, Canson watercolor

Instructions: Paint the tag with white gesso, this makes the color you add to it sort of muted and it also gives a good tooth to the paper.  Add distress inks to the tag and distress the edges, add more color to the edges.  Cut out lattice and make a frame using the rectangles dies; glue the lattice to the back of the frame and attach to the tag.  Stamp the image onto water color paper and cut out with die.  Color using distress inks.  Attach to the front of the tag.  Stamp and cut out the leaves and glue to the top of the lattice piece.  Glue a dew drop to the leaves.  Next I used the seam binding as ribbon and tied to the top of the tag.

Well that does it for me this morning.  I will be spending my day running some errands and maybe some cleaning.  Playing will have to wait until another day!


Friday, February 22, 2013

Rusty Watering Can.......


Good morning all!  I hope you are about to get your Friday started.  We are almost to the weekend and if you have great plans, I hope you have good weather! 

This morning I'm sharing another card I did using the Heartfelt Creations February release products called the Sunny Day Collection.  I stamped this on watercolor paper and colored using Ranger Distress Inks and a brush.  If you want all the specifics for this card just head over to the HC blog and have a look around.  This is listed there with all products used and the instructions for making this piece. 

Also Heartfelt Creations has issued a Design Team Call and if you think you might to apply, you can check out the requirements while you are there.  They are a great company to work for and their products are top notch! 

Well that about does it for me this morning!  I don't have any great plans for the day, but I'm hoping to find time to play!  Have a great weekend!

Wednesday, February 20, 2013

Heartfelt Creations Wednesday......

Good morning everyone!  It is Wednesday and once again time for me to share one of my Heartfelt Creations projects.  The Sunny Day Collection is such a joy to create with.  I had so many ideas racing through my head and I decided I needed to start writing some of them down so I would not forget. 


This was a nut tin in it's previous life; now it will spend the rest of it's life just sitting pretty!  We should be that lucky!  Now if you would like to have all the supplies needed for this project and the instructions, just head over the the HC blog and you will find everything there.  You will be inspired by the creativity you find there this week.  So spend a little time and look around and enjoy! 
 
Also HC has issued their design team call and if  you have an interest, take a moment and check it out!  You can do it.....I just know you can! 
 
Well that's it for me this morning.  Enjoy your Wednesday and I hope you have a moment to just "Breathe"!
 

WOYWW #194

Good morning everyone!  Wednesday has rolled around once again and it's time to share my workdesk with you.  If  you don't have a clue what I'm talking about just head over to Julia's blog  and have a look around.  She is the creator of this little monster and let me just say I'm so very addicted to this Wednesday tradition and I  hope she never decides to stop! 

 I'm here to tell you what a happy camper this old girl is to have just received my new Spectrum Noir storage unit.  It also holds Pro Markers as well or if you own Copics, they work also!  I've tried many different ways to store them and nothing just was as functional or as neat and clean looking as this. 

 
This little number is from Crafter's Companion and I love it!  Also you can see part of my Spellbinders die storage and my Spellbinders Grand Calibur machine.  The little pink machine is the Zutter Distrezz it all and I love it too, but that little sucker is always in my way.  I use it a lot but it seems to be always where I don't need it to be.  Maybe I could carry it in my pocket!  Also please note the cad perched on top of the storage piece.  It is a beautiful creation from my friend Sylvia Nelson.  She is such a good friend and I cherish her every day!  She is always there to comfort or to praise or to just lend support across the miles. 
 
Well friends, that's it for me this morning.  I'm off to get a cup of coffee and have a look around at some of the workdesks linked to Julia's blog.  

Monday, February 18, 2013

A Birthday Card.......


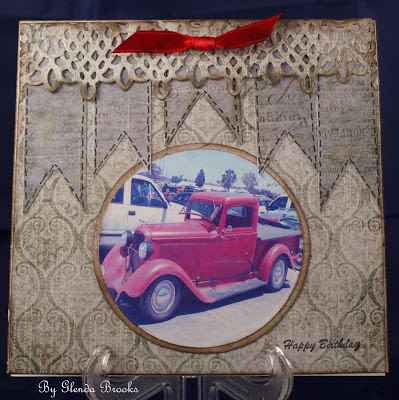
I never really realized how many January and February birthdays I have.  I have been quite busy making cards for all my family members and this is the latest.  I saw a gorgeous card on Pintrest and was inspired to make this one.  Now let me just say I'm not happy with the banner but, can you believe it, I have never even attempted this before!  I'm sure I will be forgiven for my poor attempt.  After all the truck is what everyone is interested in!  It's an antique and I got the picture off the internet and cut out with a die for my focal image!

Now I think I'm ready to move on to Easter and some Spring cards for sure!  So what do you have planned for the day?  I hope you have time to play...that's what I'm doing!

Friday, February 15, 2013

So Grateful for You... Heartfelt Creations Card...


Good morning everyone!  I hope each of you had a wonderful Valentine's Day; I sure did!  This morning I'm here to share another card I have made for Heartfelt Creations.


Heartfelt Creations Products Used:

HCPC 3520 Botanical Oval PreCut Set
HCD 730 Decorative Butterfly Corner Die

Other Supplies:  Spellbinders Standard Ovals Large, Ranger Distress Inks, white embossing powder, pink marker, Memento ink, glue, pearls, Canson watercolor paper, blue cardstock

Instructions:  Card Size 6 X 6 

Make card base with watercolor paper.  Stamp the image and emboss onto a piece of white velum as well as a piece of pink velum.  Use a pink marker to add little dots to the image.  Cut out the pink flowers and glue to the white image.  Next I cut out two of the corner dies and cut away part of the die cut to achieve a different look.  Adhere to the corners of the velum piece.  I also cut the bottom portion of the die cut and adhered it to the bottom of the card.  Glue pearls to this piece of the die cut.  Next I stamped and cut out the sentiment and while it was still in the die I added some pink ink to it to match the pink of the flowers.  Adhere the piece of vellum to the blue cardstock being careful to glue down under the corners and under flowers so the glue will not show through.  Adhere this all to the base and your card is finished.

That's it for me this morning!  I hope you have a good Friday and that you are getting geared up for the weekend!  And remember no matter where you are or what you are doing, take a moment and "Breathe"!

Wednesday, February 13, 2013

Welcome to Heartfelt Creations "The Sunny Day Collection" Release Day!

Good morning everyone!  Today is the second Wednesday of the month and the big release day for February at Heartfelt Creations!

The Sunny Day Collection captures the tranquility of a sunny day in the garden. Setting the tone with serene garden views and peaceful plant and butterfly harmonies is the Sunny Day Paper Collection. Stamps include bustling bees, a vintage watering can and botanical butterfly medleys. The Decorative Butterfly Corner Die in this collection will add unique versatility to any project. Leave a comment on the HC blog by February 19th and you will be eligible to win the entire release.

Today I'm sharing a card I made for the big release day!

Butterfly Medley
Heartfelt Creations Products Used
HCPC 3519 Butterfly Medley PreCut Set
HCDP1 230 Sunny Day Paper Collection
HCPC 3468 Tattered Blossoms PreCut Set
HCD 722 Tattered Blossoms Die
Other Supplies: Paper blossoms tool kit, Spellbinders dies (Floral Ovals, Deckeled Edge Classic Ovals Large, Classic Ovals Large) glue, stickles, Memento Ink, embossing powder, blue card stock, Canson watercolor paper, Brushed Pewter Distress Stain, seam binding, gold pearls, scor-tape, Pro Markers
Instructions:    Card Size: 6” X 6”
Make card base; cut a piece of blue card stock and attach to card base.  Stamp and color image and then cut out all your ovals.  Layer the image piece and the ovals together and attach to a piece of design paper.  Tie ribbon around this and add to card base.  Stamp, emboss and cut out flowers.  Add color; shape and glue the petals together.  Add the pearl centers and then attach to card base.
The papers and stamps in this collection just speak to me.  They remind me so much of Spring for which so many of us are longing.  This collection gives me faith that Spring is just around the corner.
Now go over to the HC blog and have a look around.  You will find so much inspiration there!  You may also visit each of the desgin team members by clicking on their names in the side bar of this blog.  Go visit and leave a comment; we all love hearing from you!  While you are at the HC blog don't forget to leave a comment there...you might just win the whole collection!
That does it for me this morning!  I hope you have enjoyed my card as much as I enjoyed making it!


Monday, February 11, 2013

My last Valentine.......


This little card should take care of my Valentine's Day cards.  I don't do nearly as many as I used to.  Just the one's for my grandsons and one or two for friends and I'm done. This little image was already colored and ready to go so all I had to do was cut her out and add a computer generated sentiment and the card is all ready to go.  Just a CAS card and one that will go in the mail with no problem.

Well that's it for me this morning.  I hope you have a good day and no matter what you are doing, I hope you find a little time to be creative!


Friday, February 8, 2013

Another Valentine's Day Card.....

Valentine's Day will be here before we know it and I still have a few cards to make.  I'm trying to keep them in a range where they will go in regular mail and not take extra postage.  Mostly I'm doing the cards for grandsons and they don't want frilly bows or fancy flowers so I've really had to rethink how I do things.


My card size is 4 1/4 X 5 1/2 and is relatively flat so it should mail just fine.  I colored my little snow girl with Ranger Distress Inks and the sentiment is one I typed and printed on my computer.  A few Spellbinders dies and my card is all set to go!

Well that's it for me this morning.  Hope you have a good day and a wonderful weekend!

Wednesday, February 6, 2013

Another Heartfelt Creations Wednesday.....

Good morning everyone and welcome to Heartfelt Creations Wednesday!  I love Wednesday because it is right in the middle of the week and I get to share what I have been working on.


Antique Lantern

Heartfelt Creations Products Used:

HCPC 3512 Antique Lantern PreCut Set
HCPC 3303 Posy Patch Flowers PreCut Set
HCD 701 Posy Patch Die
HCD 729 Decorative Blossoms Corner Die
HCDP1 Countryside Evening Paper Collection

Other Supplies:  Seam binding, cardstock, Memento Ink, Spectrum Noir Markers, Ranger Distress Ink, Scor-Tape, Zutter distress tool,  glue, pearls, dew drops in Dark Vanilla

Instructions:  Card Size 6” X 6”
Make card base using the watercolor paper for stability.  Cut a piece of the paper collection and distress the edges; add distress ink to the edges.  Glue this to the card base.  Stamp and color image; mat with a piece of brown card stock.  Stamp and cut out flowers and glue them to the image piece; attach the pearls.  Color seam binding and tie around this piece.  Cut out the corner die and then I cut some of the piece so my image would slide up under part of the die cut; glue and tape everything to the card base.

Now why don't you go on over to the HC blog and have a look around.  We all have been working hard to Wow you this week!

WOYWW #192

Another week has rolled around and it is time for me to share my work space.  I have missed a couple of weeks but am back on track and so happy to be playing along again this week.  If you want to hear about this madness, just go on over to Julia's blog and have a look around.


I have been working on some Valentine's Day cards and am in the process of coloring some cute little images and as always, I  have some flowers in the works.  I know this picture looks like it was staged, but trust me, it is not.  I have to keep my space tidy because it is such a small area and if it gets cluttered then I lose things that I really need at the moment.  Usually it's right under my nose, but it is so frustrating.  I zoomed in because I'm working on some things that I cannot show just yet.  So they are piled to the left...I'm a piler and a push to the back kind of girl!

Monday, February 4, 2013

Hearts and Flowers......

Good morning everyone!  I hope you had a good weekend!  I spent the days crafting a little and watching the big game! 

I'm here this morning to share a Valentine card I have made.  Remember when that special someone used to show up loaded down with hearts and flowers?  Well this little image just reminded me of those days and I just had to color him up and use him on this card. 

 
I colored my image with Rangers Distress inks and a brush.  My sentiment is computer generated and the heart is from the Heartfelt Creations Timeless Amour Dies  (HCD 728).
 
Well that is all I have this morning.  I hope you have a good day and that you have just a little time to be creative.  And as always, remember to "Breathe"!