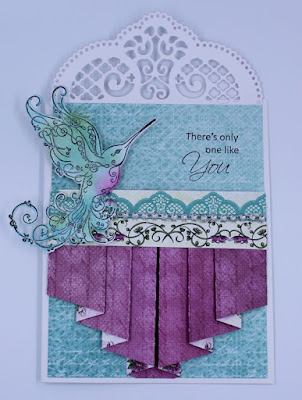
For my Friend Tag: I'm going to go ahead and apologize for this photo. Sometimes, no matter what I do it just doesn't work.
Hummingbird Cage Tag
Heartfelt Creations Products and Products Found in The HC Shop:
HCPC 3741 Botanical Orchid Cling Stamps
HCD1-7101 Botanical Orchid Die
HCD1-7102 Regal Hummingbird Die
HCPC-3742 Regal Hummingbird Cling Stamp
HCST1-401 Deluxe Flower Shaping Kit
Memento Ink in: Bamboo Leaves, Lilac Poses, Tuxedo Black
Designer Dries Clear Glue
Guacamole Colorbox Chalk Ink
Crystal Art Glitter
Minnie Pearl Prills
Other Products Used: 8mm half pearls, Ranger Glossy Accents, Canson Watercolor Paper, Dimensional Tape, Peacock Feathers Distress Ink, Hot Glue, Seam Binding, White Cardstock
Instructions:
My tag is 4 1/4 X 8 1/2. Cut a piece of watercolor paper and cover with a piece of the paper collection. Angle the top corners and punch a hole in the top. Next I stamped, cut out, colored and shaped the flowers and set aside to dry. Stamp the hummingbirds and color then add glitter and set them aside to dry. When dry I shaped them just a bit so they had a bit of dimension. Cut out the window die and use dimensional tape to adhere to the tag front. I glued the pearls and allowed them to dry. Next I colored the seam binding to match the colors of the flowers and scrunched it then set it aside to dry. When dry I tied a bow and used hot glue to adhere to the tag. I also hot glued the birds and then decided where I wanted the flowers to be and glued them down. I threaded seam binding through the hole in the top and the tag is finished.
For my Friend Tag
Heartfelt Creations Products and Products Carried in the HC Shop:
HCDP1-267 Botanical Orchid Paper Collection
HCPC-3741 Botanical Orchid Cling Stamps
HCD1-7101 Botanical Orchid Die
HCD1-7102 Regal Hummingbird Die
Designer Dries Clear Glue
Crystal Art Glitter
Colorbox Chalk Ink in Rouge
Bamboo Leaves Memento Ink
Other Products Used: Mod Podge, Walnut Stain Distress Ink, Lace, Adhesive Sheet, White Cardstock, Seam Binding, Clear Acrylic Spray
Instructions:
Here is a quick video on how to shape the beautiful Botanical Orchids:
https://www.heartfeltcreations.us/howto?view=videos&videoID=70
My tag is 5 1/8" x 8 1/2". Cover the tag with a piece of the paper collection using Mod Podge. Use Bamboo Leaves ink to distress around the edges of the paper. Next I cut another piece of the paper and distressed the edges and tore it in places. I used Walnut Stain ink to go around the edges so it would not be showing white. Cut a piece of the lace and glue down behind one of the torn places of the paper and adhere the layer with glue. Pick another piece of the paper that looks good with what you have used already and distress the edges. I used Bamboo Leaves ink to go around the edges of this layer then I glued this layer down. Adhere a piece of white cardstock to the adhesive sheet and then die cut the window. Peel away the backing and apply glitter to the sticky surface. Spray with the acrylic spray to keep the glitter from falling away. Glue the window to the front of the tag. Next I stamped, cut out, colored and shaped the flowers and added flower soft to the center. I die cut the tendrils from the paper collection and glued them onto the window die cut. Add the flowers over the tendrils and glue down. Next I colored a piece of seam binding to match the flowers and tied a bow. Glue it to the top of the tag. Fussy cut one of the tags from the paper collection and adhere it to the tag using dimensional tape.
I know this has been a very long post and I am so glad you stayed with me. For more inspiration please visit the Heartfelt Creations Blog!


